
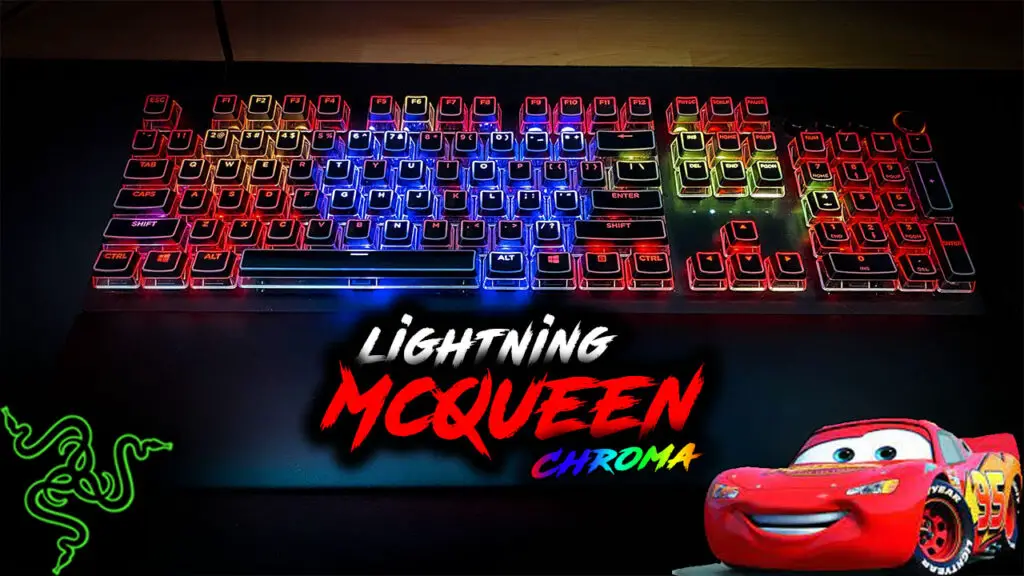
This weeks Razer Chroma RGB design was inspired by a comment request made on my YouTube channel. Tim Abramsson asked “hey can you make a lightning mcqueen profile? please”. So here we are with what I would consider one of my favorite profiles that I’ve made based on request… Lightning McQueen.
Follow along with the instructions below and see how I made this design, download this profile from the link below, or become a YouTube Member for access to video tutorials of my designs.
The Lighting Design
Since the design is based on the Disney character lightning McQueen the majority of what you’ll see on the keyboard is red and yellow colors. The profile displays a red background with a yellow colored Lightning bolt across the keyboard.
This is definitely what I would consider to be an RGB design that is advanced. Especially due to the complex Audio Meter and the addition of the “95” number effect on the keyboard.
Keep in mind all of these effect layers are optional and if you don’t want them in the design you can just skip those steps. If you’re downloading the design you can also just delete the unwanted effect layer.
Request
Effect Layers

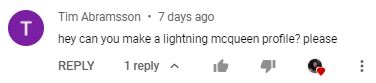
Static Red Background
We start making this design with a red static effect layer. Apply this effect on all available lighting zones.
Starlight Effect Layers
Next we’re going to add 2 separate starlight effect layers to all of our devices which helps create some attraction, especially for your additional chroma devices. Also, by adding the starlight layers first they won’t interfere with some of the more iconic layers that we’ll be making later.
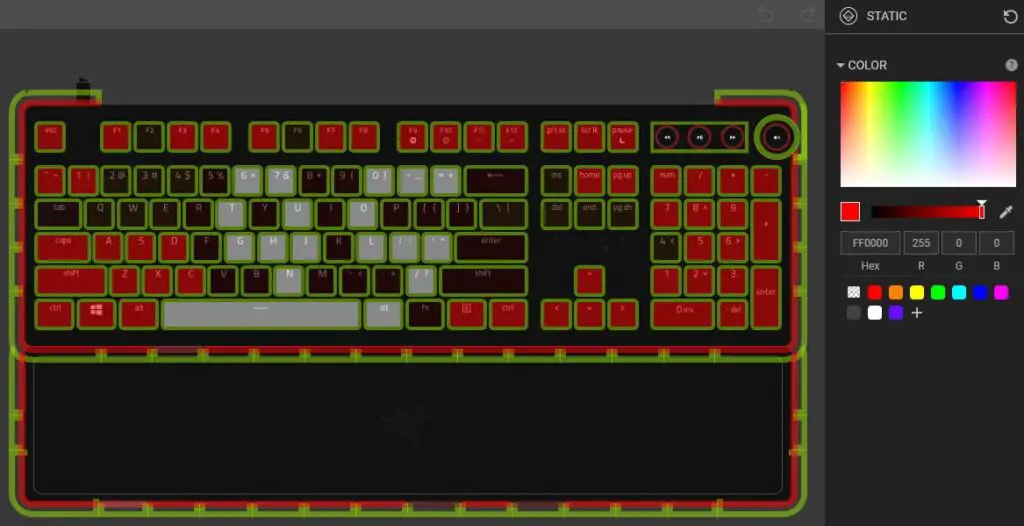
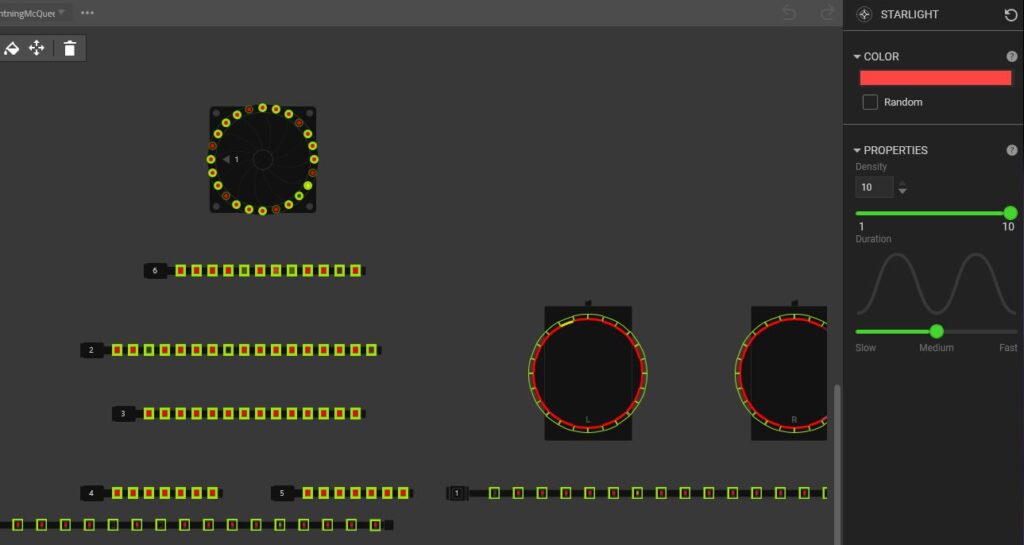
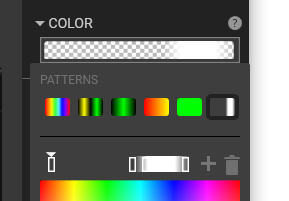
For the first Starlight effect layer select all your available lighting zones and apply a 2 node color gradient. The left node we set to an orange color. The node on the right we’re going to use a yellow color.
The effect properties I chose to go with on this one was a Density of 10 and a Duration of Slow. That way we get as many star lights as possible and they stay lit longer.
You can right click the first Starlight layer and duplicate it or just start a brand new one. This new Starlight layer is going to have the same properties as the one above, except we are going to make it one single color node. For the color of that node I chose to go with a lighter red color.
Lightning Stripe Wave Layer
For this next effect layer I used one of my common tricks to create gradient color across the keyboard which makes up the Lightning bolt shape.
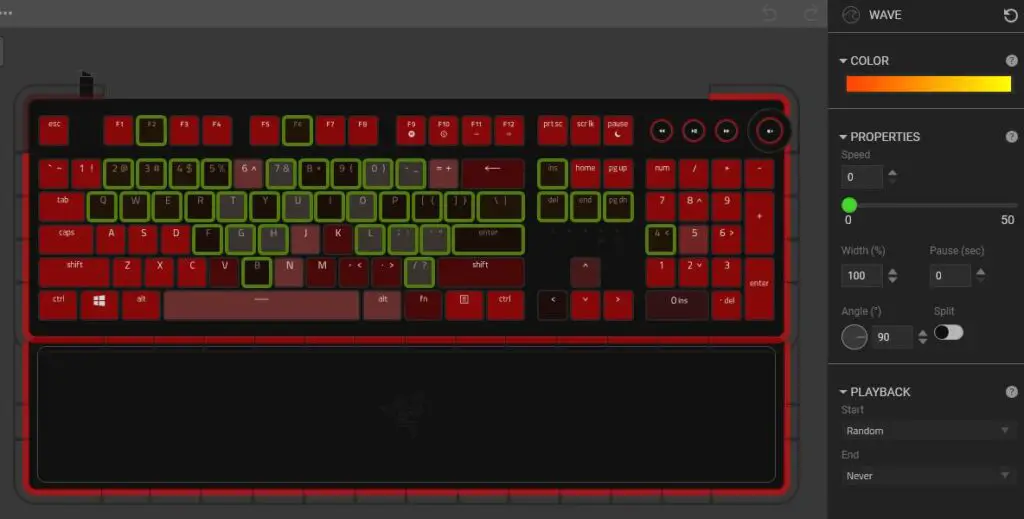
To do this we’re going to add a new Wave effect layer
Select lighting zones on your keyboard which make the shape of a lightning bolt(see photo below for reference).
Adjust the properties of this effect so that the Speed is 0.
The color gradient will just be a 2 node gradient with orange being on the left and yellow being on the right.
Lightning Bolt Audio Meter
This next effect layer can be a trickier one to make if you’re not following instructions carefully. By adding this Audio Meter effect layer on top of the Lightning bolt stripe, and utilizing transparent color nodes, we are able to manipulate the lightning bolt appearance with audio.
Add a brand new Audio Meter effect layer.
Select the lighting zones to the far left side of the lightning bolt. See picture below for reference.
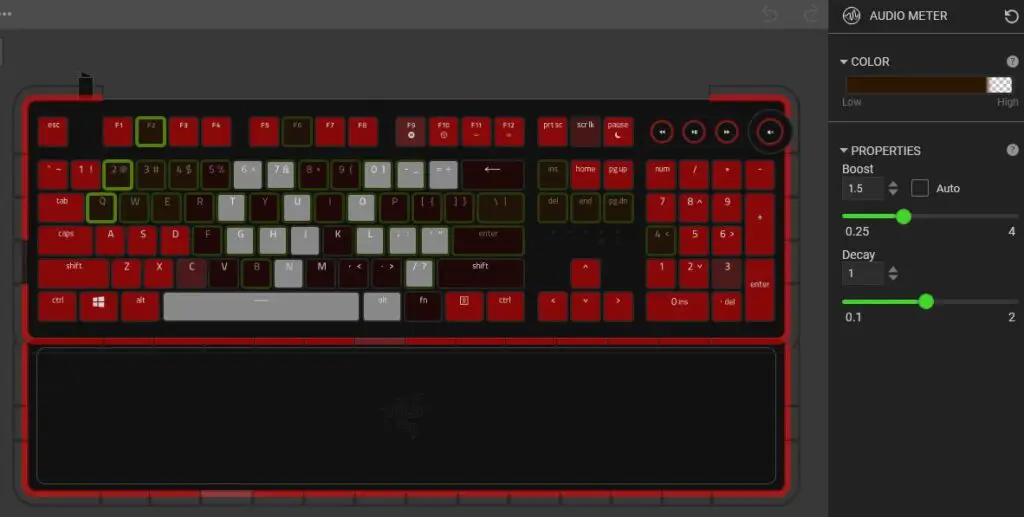
With those left 3 lighting zones selected make the necessary property adjustments that work best for your PC’s audio settings. If you’re not sure what to change these to then it’s probably best to just go with the Auto box checked.
The color gradient for the Audio Meter effect is going to be a 2 node gradient. The left node will be a dark orange color and the right node will be transparent. What this does is for the lighting zones to be a dark orange until audio reaches a certain point, at which the original lighting bolt beneath will then show.
These 3 lighting zones we want to light when audio is at its highest. Therefore, the color nodes are going to be pressed together near the right side of the gradient bar leaving a small space between the nodes and the right edge(see above photo for reference).
The rest of the audio meter from here is rather easy.
- Copy the effect that you made on the 3 left keys.
- Select the lightning bolt zones immediately to the right of them(see below pictures for reference).
- Paste the effect on the new lighting zones.
- Click on the color gradient and slide the color nodes to the left a little bit.
- Repeat these steps until you go through all of the lightning bolt lighting zones.
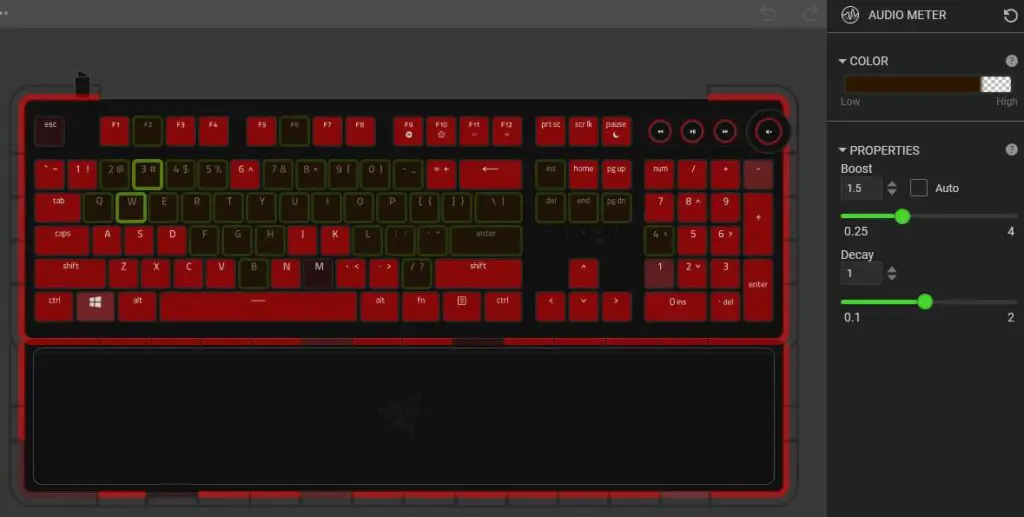
In the pictures below I’ll give you an example of what I did for the first second and third rows of the audio meter. Take note of how the color gradient changes as I move to the right. There should be a slight change showing a bigger transparent space as you move right.

Number 95 Effect
This next layer is probably the most difficult to understand and is definitely one of the more advanced techniques you can do with chroma. This can be done simply by using a Spectrum Cycling effect however it is far more customizable with the Wave effect layer.
Start this effect by adding a new Wave effect layer.
Select the lighting zones that make up the shape of a “95” number(see below photo for reference on what I used.
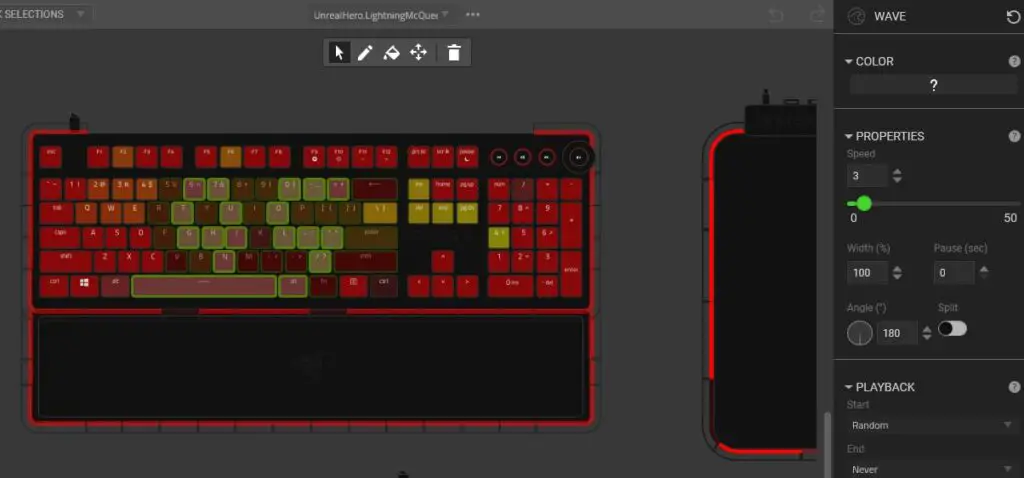
With these lighting zones selected we’re going make some adjustments to the wave effect properties. Set the Speed to 0. We’re also going to change the Angle to 180 to get the pattern going straight down.
For the color gradient we’re going to go with a 5 node color gradient. Set the node colors as follows:
Transparent > Transparent > White > White > Transparent
Space the nodes out on the color gradient as you see in the photo below.
With the color nodes set like this essentially what you’re telling the program to do is to make these keys turn white for a little while and then go back to normal.
Now, what you’re seeing on your keyboard right now is that each horizontal row of keys is lighting up white at different times. We want them all to light up at the same time. To do this we need to make each horizontal row of keys unique from one another.
This is where the first Transparent node comes into play.
- With the “95” shape lighting zones still selected hold CTRL
- Click all the highlighted zones on the top row which will deselect the top part of your “95” shape(This should be the 6, 7, 0, -, and = lighting zones).
- Then click on your color gradient and move the the left transparent node to the right slightly.
You’ll notice now in the preview window that there are now 2 rows of keys that are now lighting in sync. Repeat this process for each horizontal row of lighting zones so that each one is unique and they are all lighting in sync with one another.
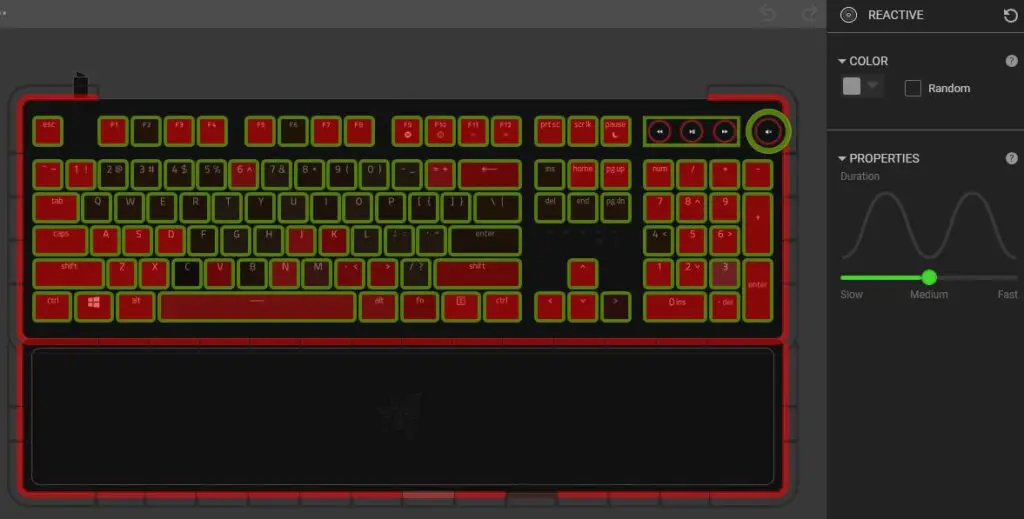
Reactive Effect Layer
Lastly, for this design I added a Reactive effect layer with a white color so that the keyboard reacts to the keys that I am pressing.
Hopefully you were able to follow along with the instructions and were able to successfully recreate this design.
Please keep in mind that if you’re trying to recreate this design using a different sized keyboard such as a ten-keyless or Mini the result may differ.
DOWNLOAD HERE
Follow UnrealHero

If you’re a fan of RGB then you might consider following for my latest content on these platforms


Can’t figure out how to import Razer Chroma Profiles??
Check out THIS POST to learn how!
Want more Cool Razer Chroma Profiles? Check out my Profile Gallery

Join our Chroma Profiles community on Reddit or Discord! There are thousands of members sharing ideas, tips, and even more Chroma Profiles.
binance
Tuesday 12th of August 2025
Can you be more specific about the content of your article? After reading it, I still have some doubts. Hope you can help me.
inscreva-se na binance
Friday 8th of August 2025
I don't think the title of your article matches the content lol. Just kidding, mainly because I had some doubts after reading the article.
binance signup
Monday 26th of May 2025
Your point of view caught my eye and was very interesting. Thanks. I have a question for you.
Зарегистрироваться в binance
Monday 26th of May 2025
Your article helped me a lot, is there any more related content? Thanks!
ücretsiz binance hesabi
Sunday 20th of April 2025
I don't think the title of your article matches the content lol. Just kidding, mainly because I had some doubts after reading the article.