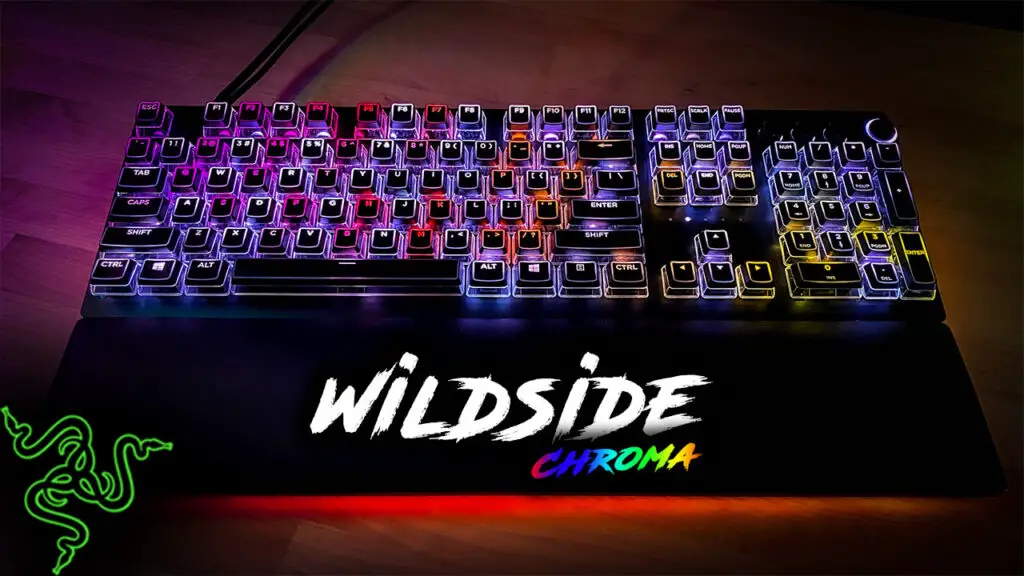
Chalk it up as another successful rainbow colored Razer chroma profile to add to my profile library.
Rainbow colored RGB designs are usually fairly popular. This animated wave pattern with the white overlay on Wildside is sure to be a fan favorite.
Follow along with the instructions below and see how I made this design, download this profile from the link below, or become a YouTube Member for access to video tutorials of my designs.
The Lighting Design
This design is a rainbow colored RGB effect the has white colored wave pattern on top. There is also an Audio Meter which darkens the Rainbow color at lower audio levels. Finally, this design is topped off with white and black colored ripple layers.
I would consider this RGB design to be intermediate difficulty to make. It’s mostly simple except for the white wave effect on the design.
Keep in mind all of these effect layers are optional and if you don’t want them in the design you can just skip those steps. If you’re downloading the design you can also just delete the unwanted effect layer.
Effect Layers
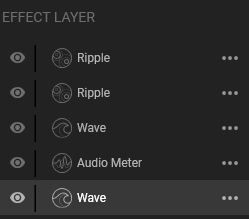
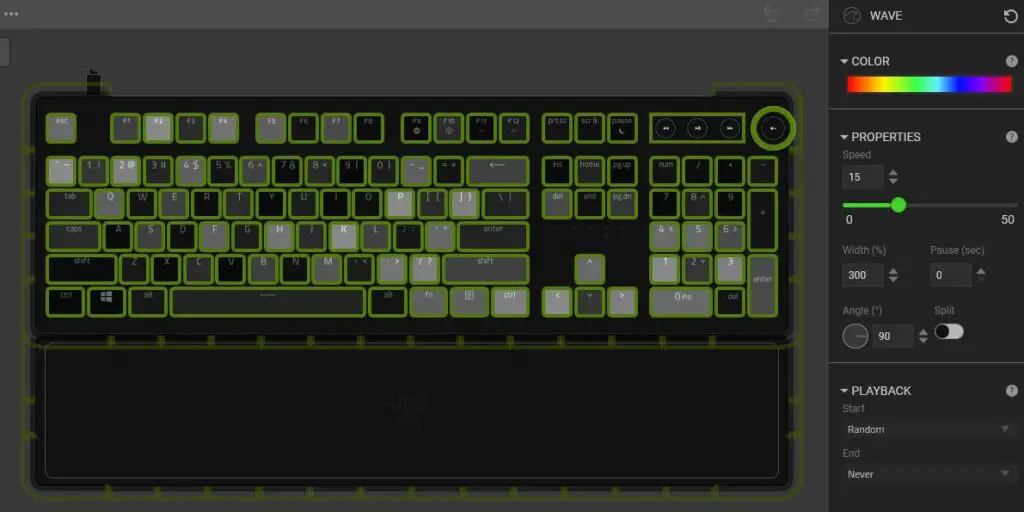
Rainbow Wave Background
We begin this design with standard multi-colored wave effect layer. The only property value that needs to be changed is the width to 300. Apply this effect to all lighting zones.
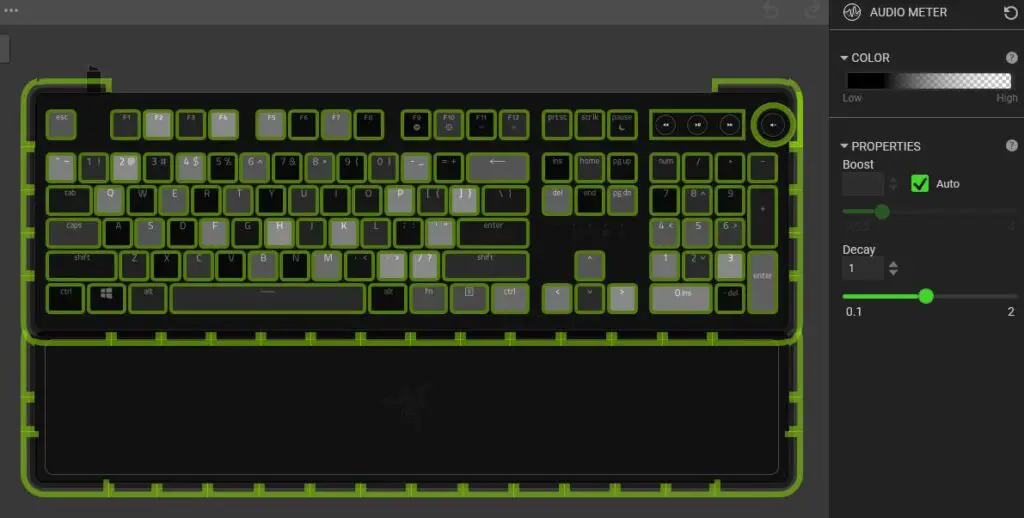
Audio Meter Layer
The second Effect layer that we’re going to apply to this design is the Audio Meter effect. We place this layer right on top of the first layer because we’re going to use it to change the brightness of only the rainbow color in the design.
Begin by selecting all of your available lighting zones. Then make your adjustments to the property values that make the audio meter stand out best on your setup. Each PC is going to need different settings for this based on how the audio is set up.
Follow by selecting the color gradient bar and selecting a 2 node gradient. By placing a black node on the low side and a transparent node on the high, we create an effect that darkens the layers beneath it when the audio levels are lower.
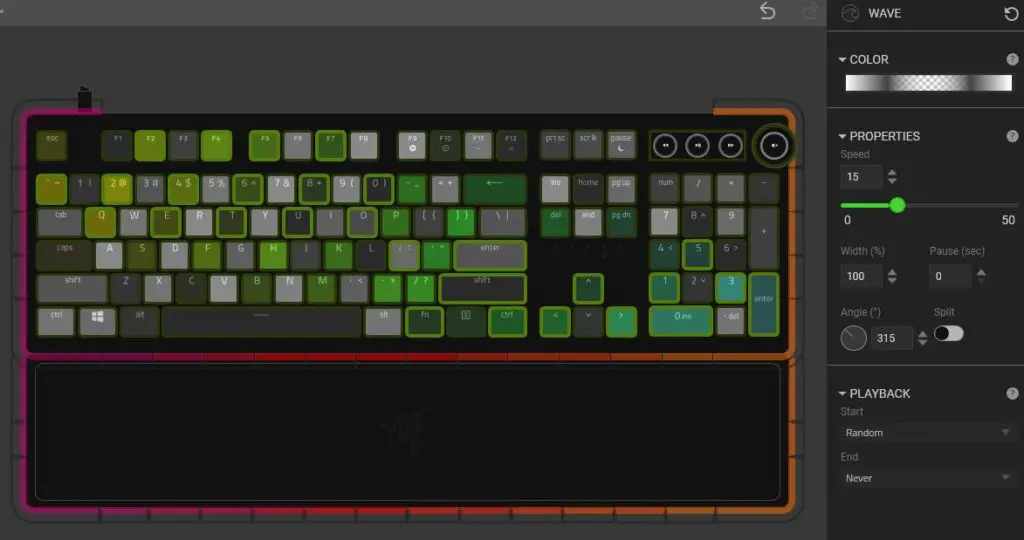
White Wave Layer
Next comes tricky part which is the white colored animation that you see on the design. We’re going to add a Wave effect layer to create it.
On all the keyboard lighting zones we are going to add these effect properties:
- 5 node color gradient: (white, dark gray, transparent, dark gray, white)
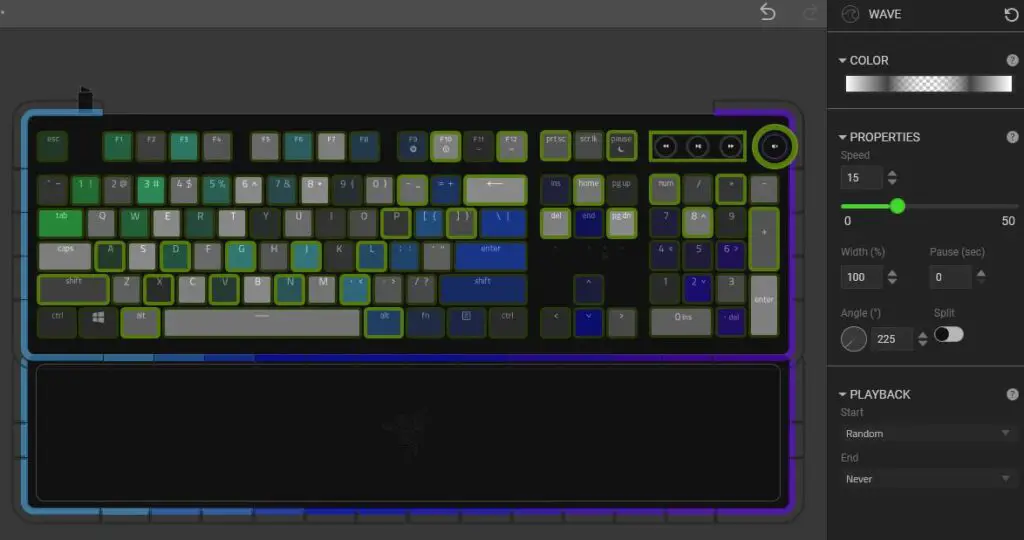
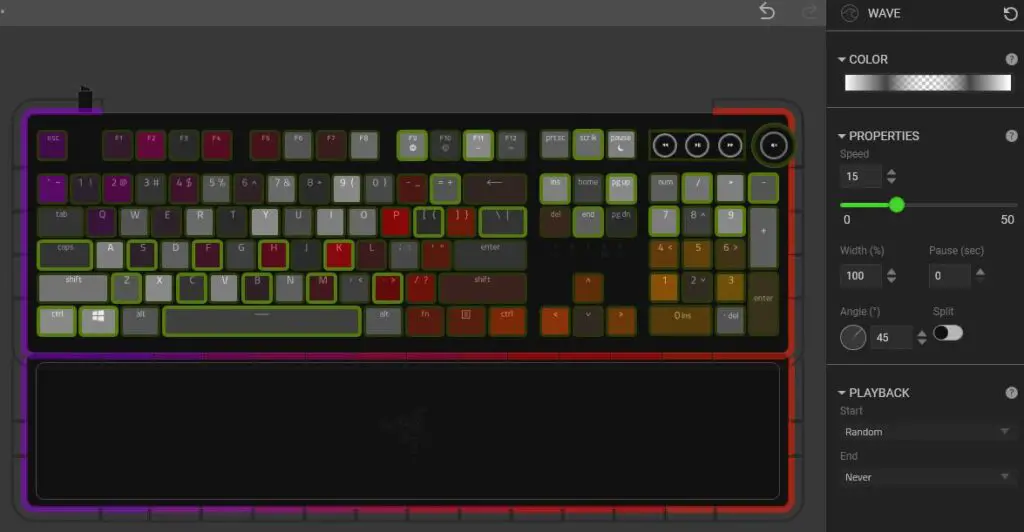
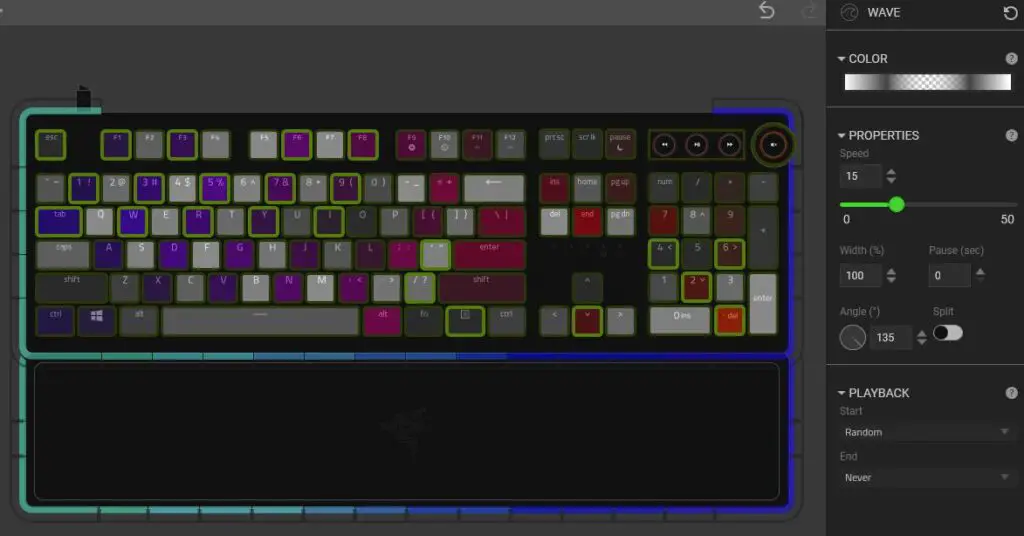
You then are going to need to divide up the lighting zones in a checker board pattern by deselecting every other key and then by 4 quadrants (See the below photos for details).
Working with every other lighting zone in the lower left and upper right we set our angle to 45. The other lighting zones in those same quadrants that are not selected we will change the angle to 225.
For the lighting zones in the upper left and lower right we select every other lighting zone in a checkered pattern. Change the angle to 315. For the other lighting zones not selected in those quadrants set to a 135 degree angle.
If this gets confusing just try to replicate the photos below.
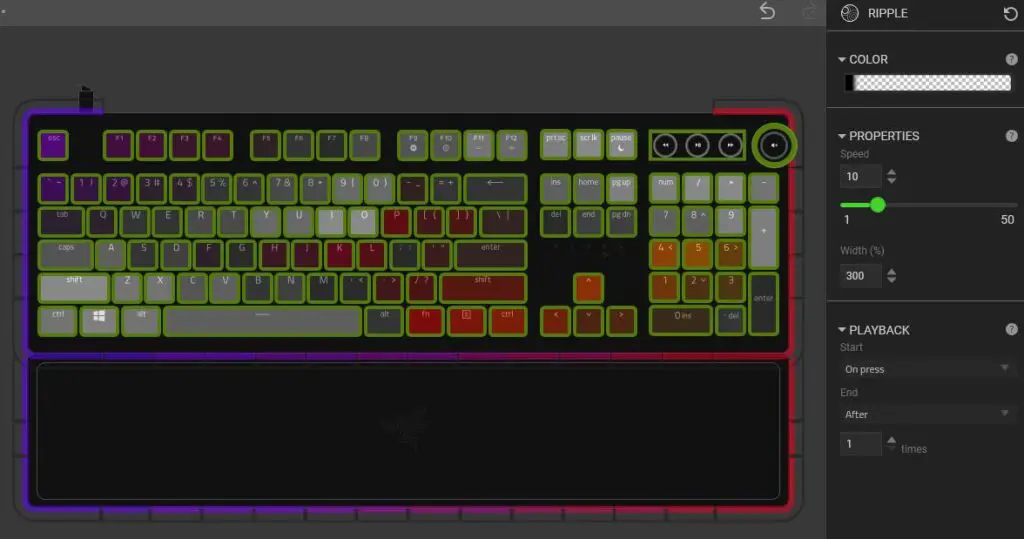
Ripple Effect Layer 1
We finish off this design by adding a couple of different Ripple effect layers.
The first Ripple layer is a 2 node ripple effect layer with a speed of 10 and a width of 300 on all keyboard lighting zones. Both color nodes will be moved to the left side of the gradient bar leaving only a sliver of space on the left end. The left node will be black and the right node will be transparent.
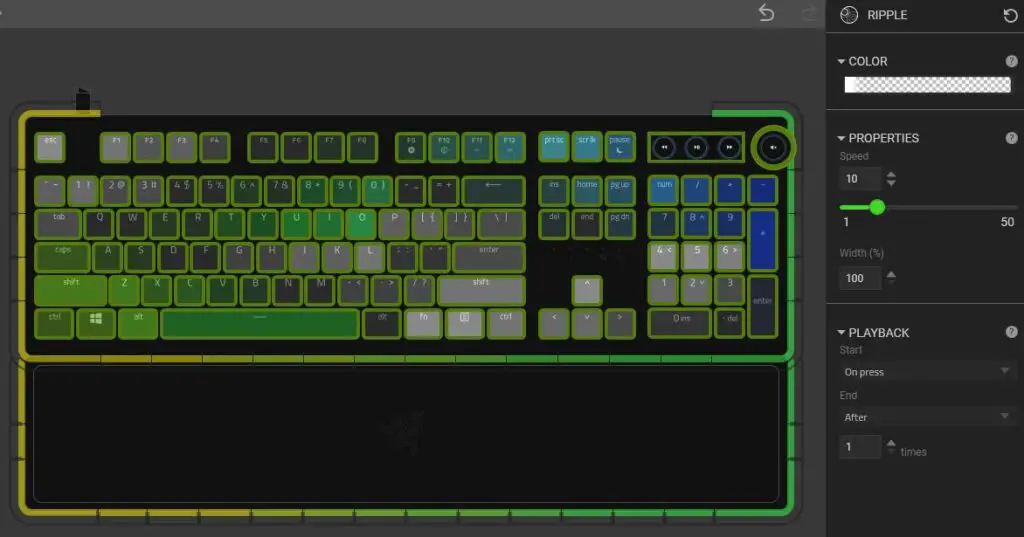
Ripple Effect Layer 2
Copy the effect made on the previous ripple effect
Add a new Ripple effect layer and paste the effect from the first on all keyboard lighting zones. Change the width property to 100. On the Color gradient change the black node to a white node.
Hopefully you were able to follow along with the instructions and were able to successfully recreate this design.
Please keep in mind that if you’re trying to recreate this design using a different sized keyboard such as a ten-keyless or Mini the result may differ.
DOWNLOAD HERE
Follow UnrealHero

If you’re a fan of RGB then you might consider following for my latest content on these platforms


Can’t figure out how to import Razer Chroma Profiles??
Check out THIS POST to learn how!
Want more Cool Razer Chroma Profiles? Check out my Profile Gallery

Join our Chroma Profiles community on Reddit or Discord! There are thousands of members sharing ideas, tips, and even more Chroma Profiles.
miglior codice di riferimento binance
Monday 11th of August 2025
Your article helped me a lot, is there any more related content? Thanks!
Gate.io
Friday 8th of August 2025
The official platform of Gate.io offers secure and efficient digital asset trading services.
www.binance.com sign up
Thursday 26th of June 2025
I don't think the title of your article matches the content lol. Just kidding, mainly because I had some doubts after reading the article.
binance
Sunday 1st of June 2025
Thank you for your sharing. I am worried that I lack creative ideas. It is your article that makes me full of hope. Thank you. But, I have a question, can you help me?
binance
Friday 16th of May 2025
Your point of view caught my eye and was very interesting. Thanks. I have a question for you.