Due to the recent release of the latest movie released in the series, The Matrix Resurrections, I’ve been asked to make a version 2 of my Matrix chroma profile.
This new version brings some similarities to the original version. However, I’ve included lots of additional features with this one. Including an Audio Meter as well as reactive wave layers which is displayed on the row where a key is pressed.
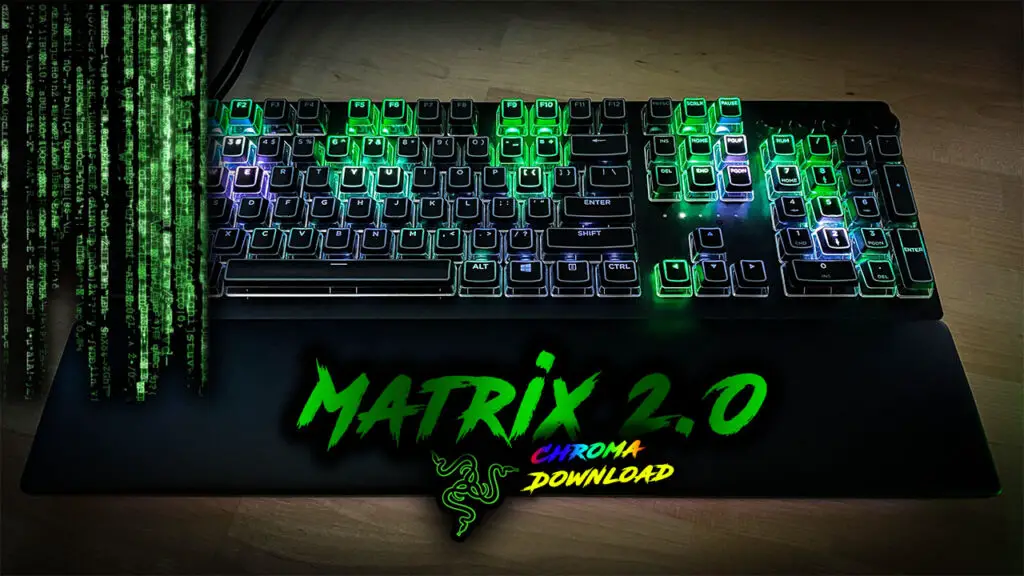

The Lighting Design
There are many Wave effect layers used to create what you see in this design. Also, like many of my more recent designs, I used a Spectrum Cycling effect layer to help create the background so there is a slight fluctuation of color.
Unique to this design is a feature I added on key press. The row of keys in which a key is pressed displays an orange colored wave pattern that moves from right to left. This wave looks the same as waves falling vertically
Effect Layers
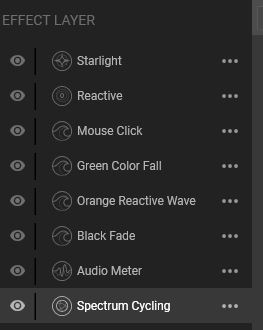
Spectrum Cycling
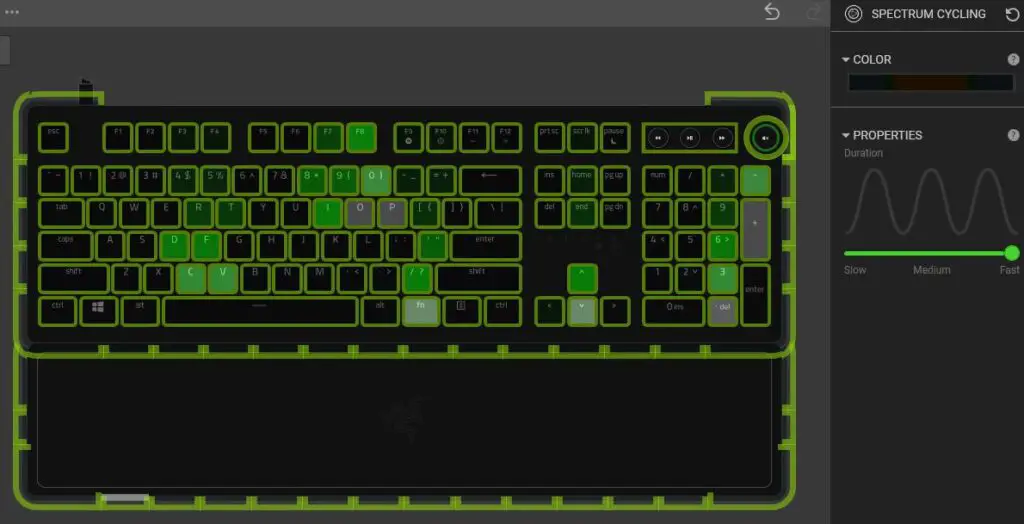
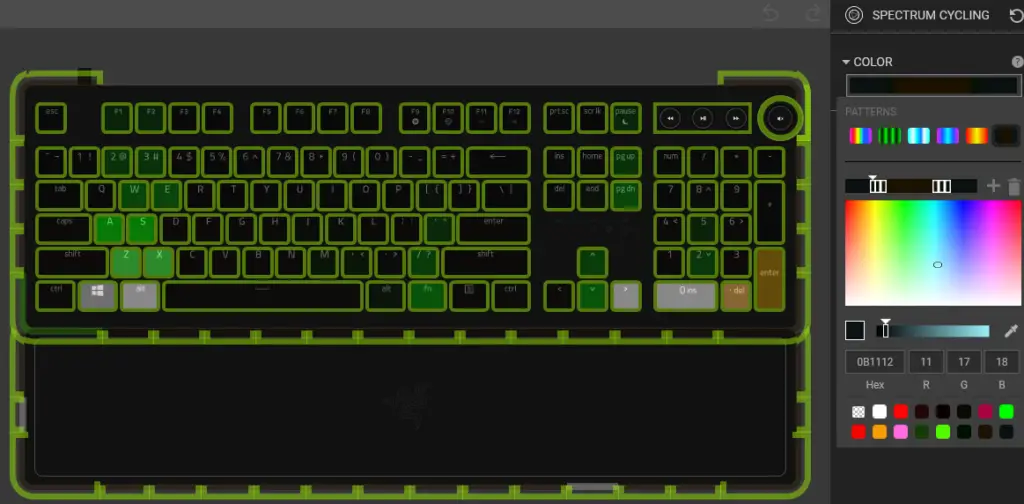
We’re going to start this design by painting our background with a Spectrum Cycling effect layer.
The colors used in this effect layer is a darker shade of blue (#0B1112), green (#001200), and orange (#1C1100).
On my devices I changed the Duration property to Fast.
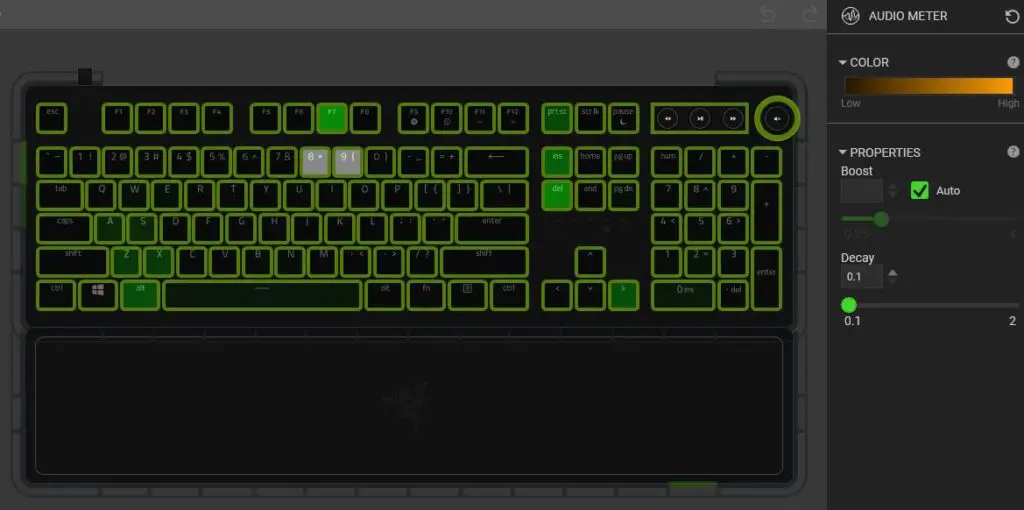
Audio Meter
We’re going to be choosing an Audio Meter effect for our second layer because we want to keep the audio activity in the background of our design but also need it to override our Spectrum Cycling background.
The Audio Meter layer is a basic one but noticeable. This will be just a 2 node gradient with darker orange on Low and brighter orange on High.
Black Fade Wave Effect Layer
Next we’re going to add a Wave effect layer which is just going to cover and mask over our background layers. This is just going to be a black and transparent wave with 0 speed and is designed to give our background a faded appearance.
Orange Reactive Wave Layer
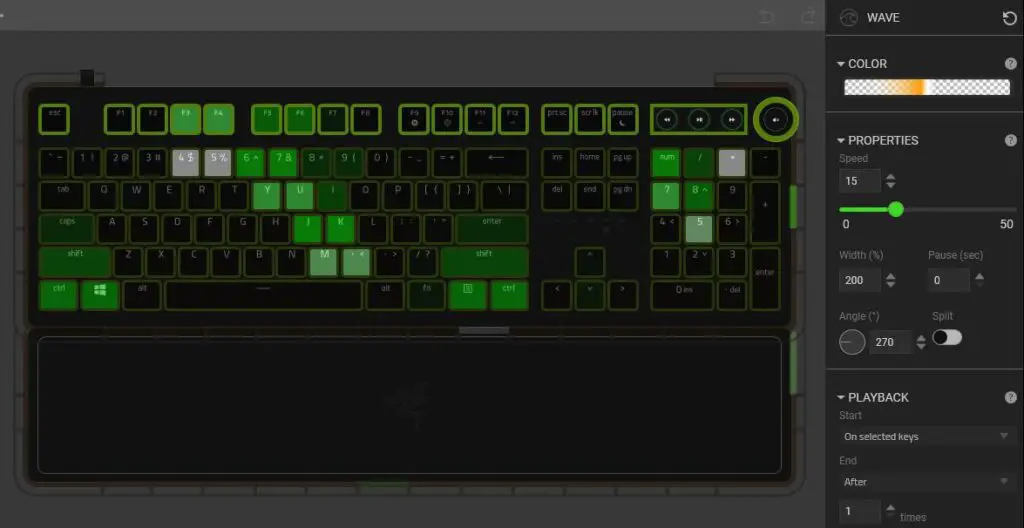
Next, we’re going to add the unique orange reactive Wave effect layer. This part can be a little tricky because each horizontal row of keys needs to look the same, but also needs to be unique from one another.
The property values for this effect layer are as follows:
- Width: 200
- Angle: 270
- Playback > Start: On selected keys
- Playback > End: After 1 time
So because we want this effect to start from the edge and work its way over, we have to use a wave with 200% width and have the right half of our color gradient be transparent. This allows for nothing to be visible immediately after the key is pressed.
The very middle of the color gradient is where we begin to add color which becomes visible just after pressing a key.
Start with a white node to highlight the head of our wave effect with an orange node right up against it. Throw a transparent node at the end of the color gradient so the orange color trails off.
In the transparent side of the color gradient add in an extra transparent node. This additional transparent node can be adjusted for each horizontal row of keys to make them each unique.
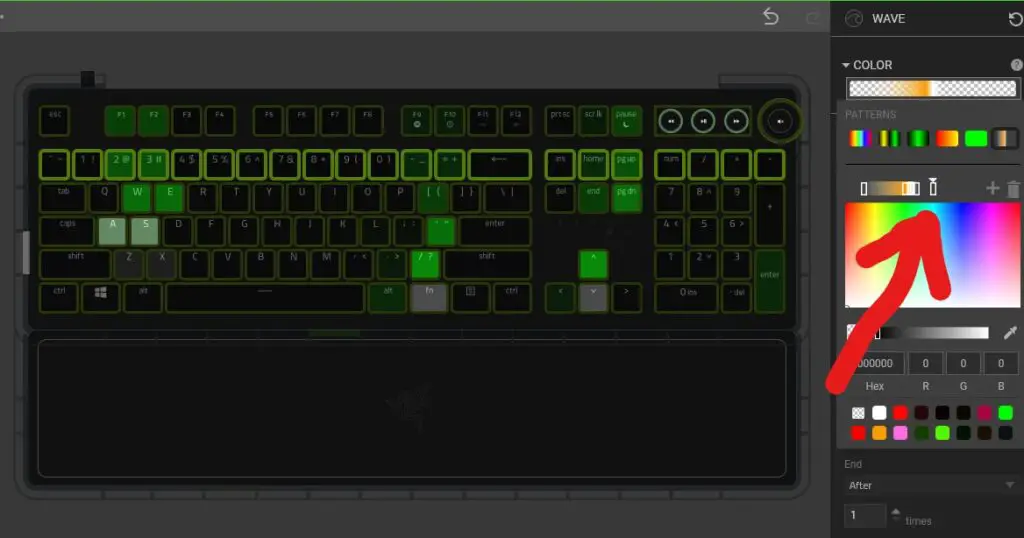
Copy the effect you made on the top row and paste it on all other rows. Slightly move the adjustment node for each horizontal row to make them all unique while having the same appearance.
Falling Green Wave Effect
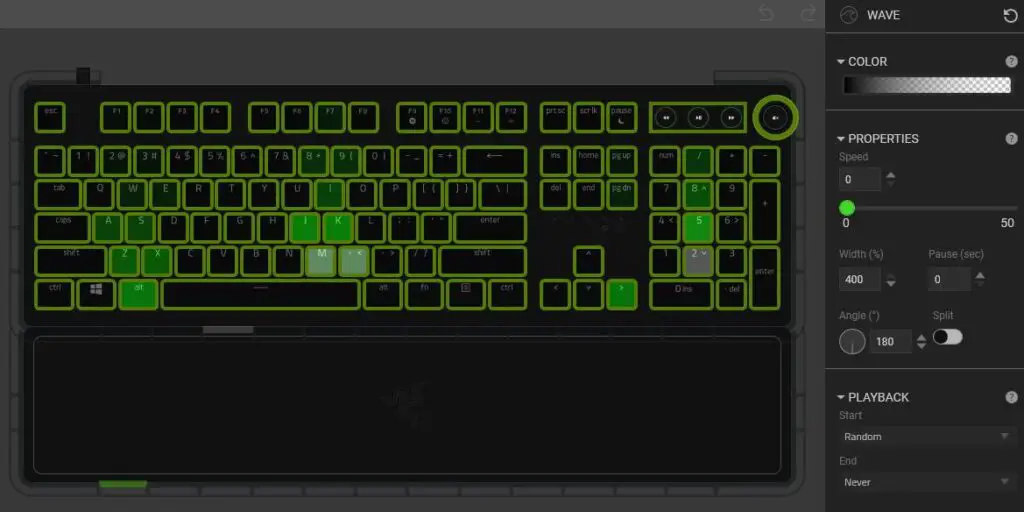
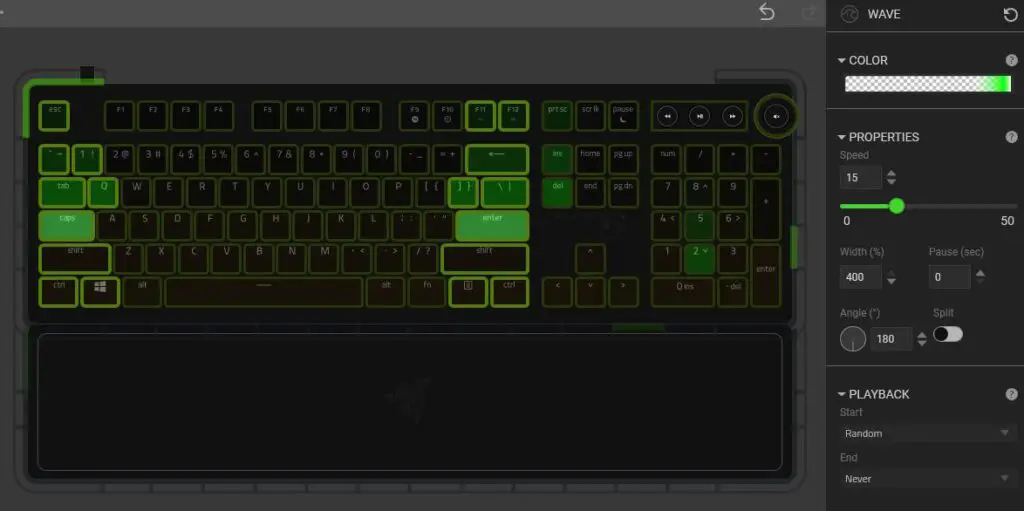
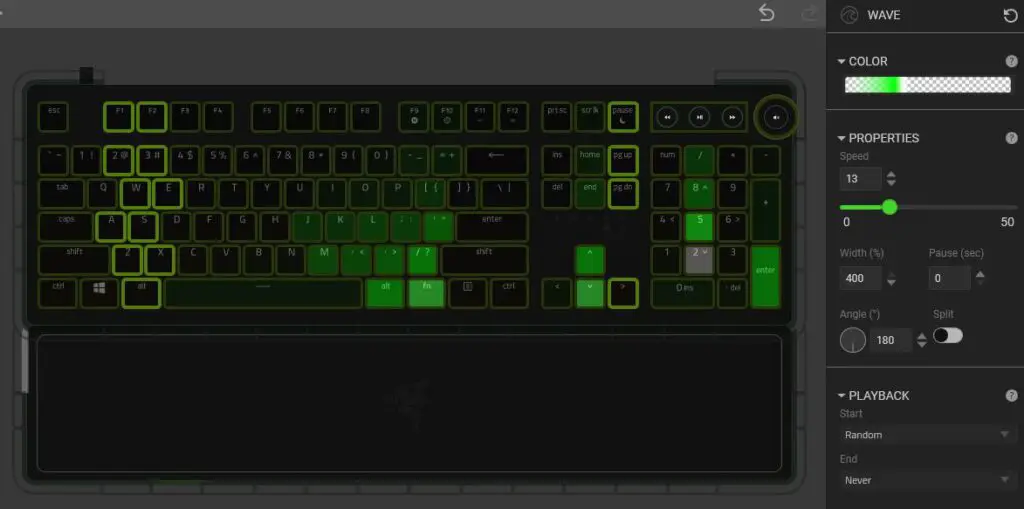
Add another Wave effect layer which is going to give this design the iconic look of the Matrix falling text animation.
Here we can select all lighting zones and need to make sure our wave properties are as such:
- Width: 400%
- Angle: 180
The color gradient is going to mostly be transparent with 2 transparent nodes on the outside. A white then green node should be added between the transparent nodes and drag them tight to the right transparent node. All of these should take up approximately 25% of the total gradient bar.
After that you can randomly select different horizontal rows of keys and make them unique from one another by changing the speed and/or moving the nodes on the color gradient.
Mouse Wave Effect Layer
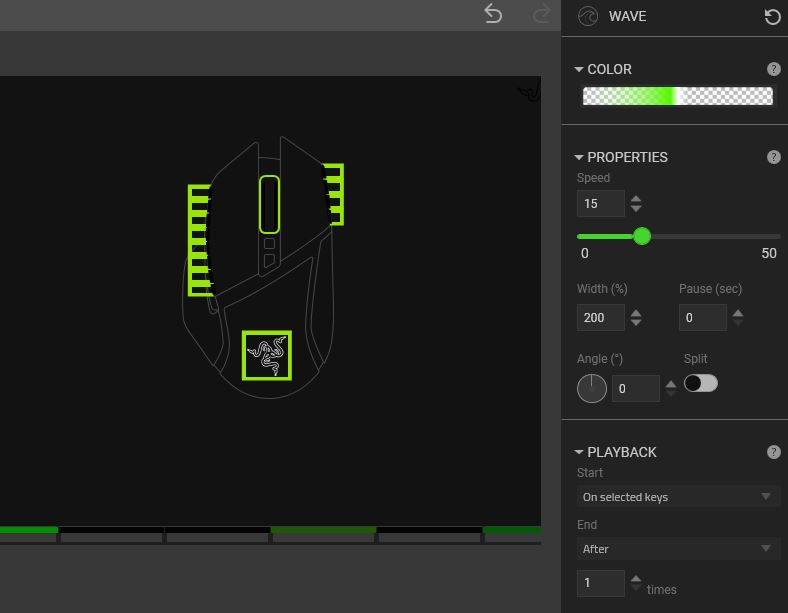
I added a mouse click wave animation by adding another Wave effect layer. Select all lighting zones on your Razer mouse and change the properties as follows:
- Width: 200
- Angle: 0
- Playback > Start: On selected keys
- Playback > End: After 1 time
The color gradient should look exactly like the Orange Reactive wave layer we made except for this I used green.
Reactive and Starlight effect layers
I finished off this design with a basic white reactive layer on all keyboard lighting zones. Finally, for all of my Razer devices besides my keyboard I added a white and green starlight effect so that other peripherals had a pop of light.
If you liked this design, be sure to check out my Hacking the Matrix profile I recreated which is very similar.
Follow UnrealHero

If you’re a fan of RGB then you might consider following for my latest content on these platforms
Can’t figure out how to import Razer Chroma Profiles??
Check out THIS POST to learn how!
DOWNLOAD HERE
Want more Cool Razer Chroma Profiles? Check out my Profile Gallery
Join our Chroma Profiles community on Reddit or Discord! There are thousands of members sharing ideas, tips, and even more Chroma Profiles.


binance
Tuesday 12th of August 2025
Thank you for your sharing. I am worried that I lack creative ideas. It is your article that makes me full of hope. Thank you. But, I have a question, can you help me?
Binance
Sunday 3rd of August 2025
Thanks for sharing. I read many of your blog posts, cool, your blog is very good.
crie uma conta na binance
Friday 18th of July 2025
I don't think the title of your article matches the content lol. Just kidding, mainly because I had some doubts after reading the article.
otevrení úctu na binance
Sunday 27th of April 2025
Can you be more specific about the content of your article? After reading it, I still have some doubts. Hope you can help me.
Binance创建账户
Friday 25th of April 2025
Your point of view caught my eye and was very interesting. Thanks. I have a question for you.