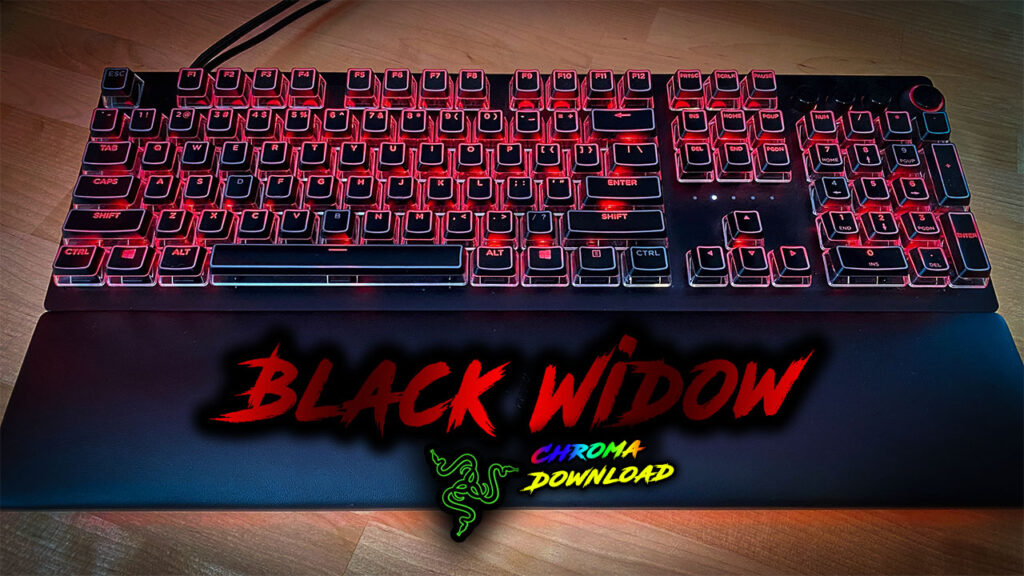
Several times viewers of my YouTube channel have asked me if I can make a profile based on the popular Marvel character Black Widow. Those viewers are who I dedicate this Black Widow Razer chroma Profile to.
This red and black RGB lighting design has a very unique wave effect which prominent in the design. Most viewers who see this design will be wondering how I made this black moving wave effect which I will discus in the walk-through below
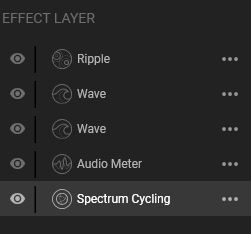
The Lighting Design
The primary visuals of this design is made up using the Wave effect and a Spectrum Cycling effect within the Synapse 3 software. Also included in the RGB design is a close proximity green Ripple effect and a subtle Audio Meter effect.
Effect Layers
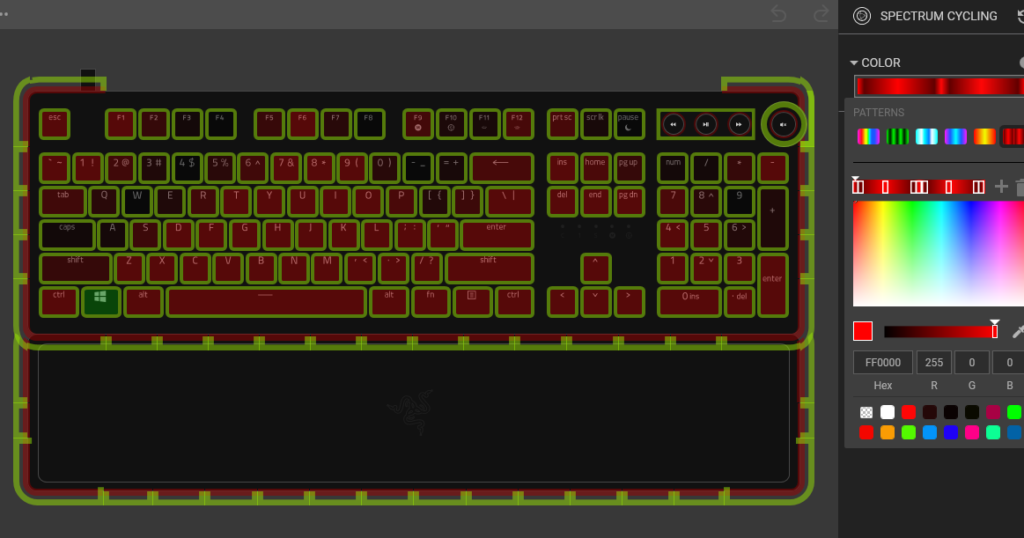
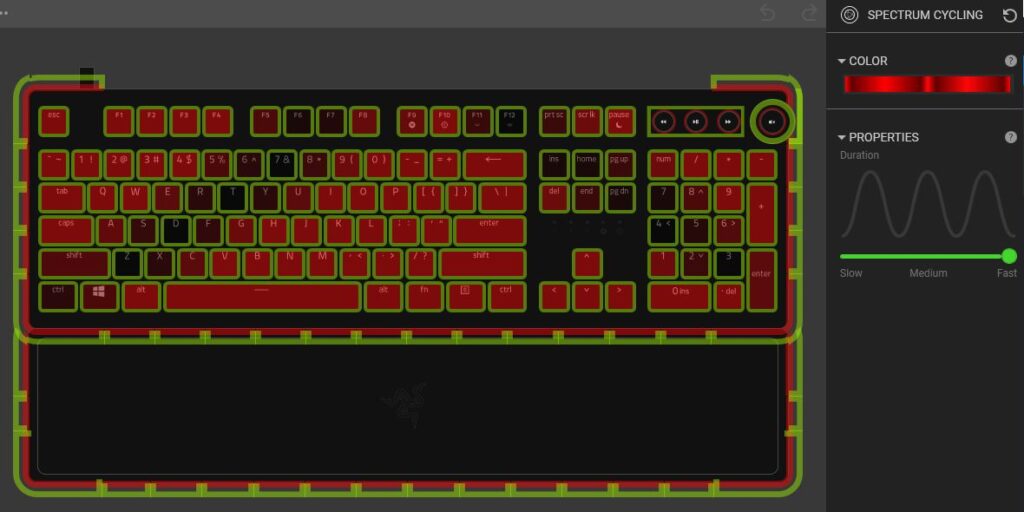
Spectrum Cycling
To start this Razer chroma profile we’re going to begin with a Spectrum Cycling effect layer on all available lighting zones. I used some color snapped nodes(placed nodes close together) with this layer just to make it look a little different than my usual Spectrum Cycling effects.
There are many color nodes on the gradient but all together is only 2 different colors which are light and darker shades of red. I also set my Duration to Fast so the effect cycles through quicker.
Audio Meter
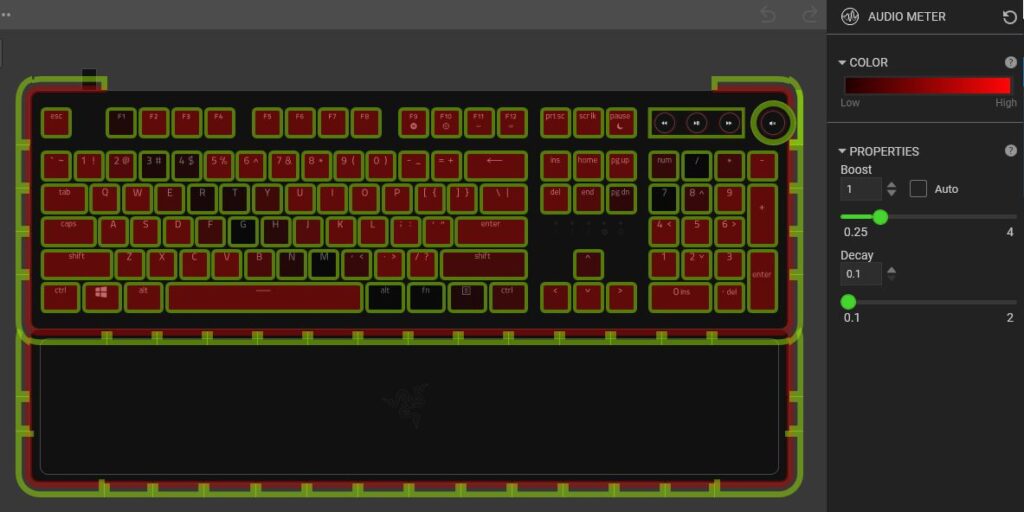
We’re going to be choosing an Audio Meter effect for our second layer because we want to keep the audio activity in the background of our design but also need it to override our Spectrum Cycling background.
The Audio Meter layer is a very basic but noticeable one that we’re going to apply to all available lighting zones. This will be just a 2 node gradient with darker red on Low and brighter red High.
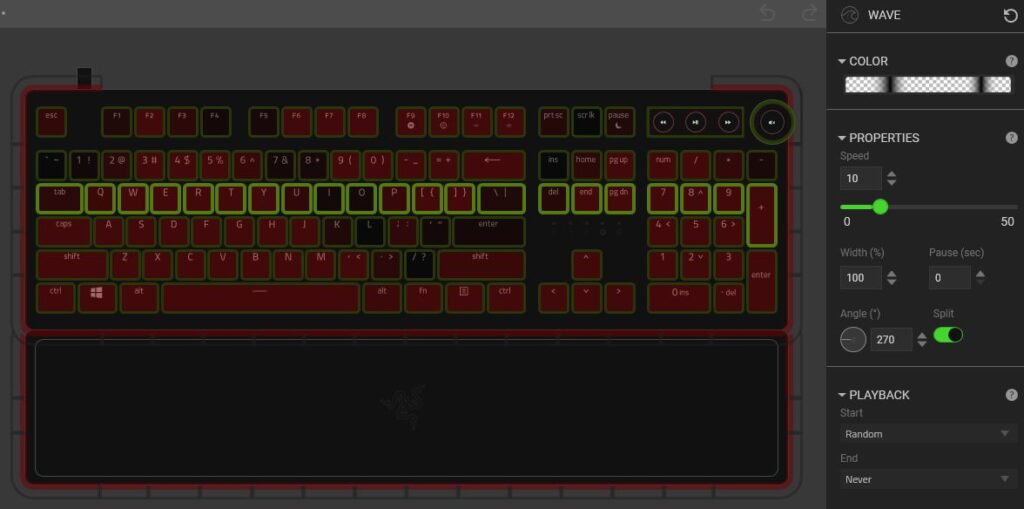
Wave 1
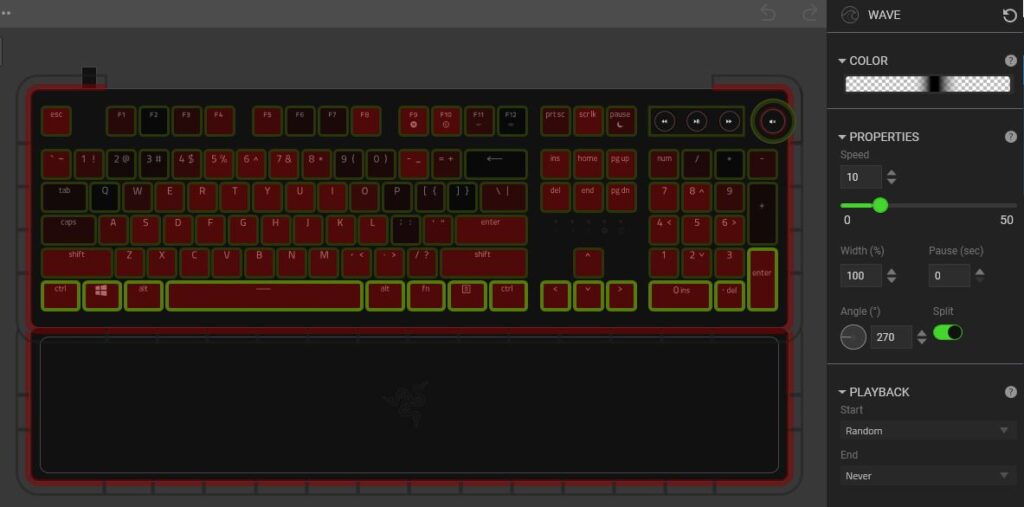
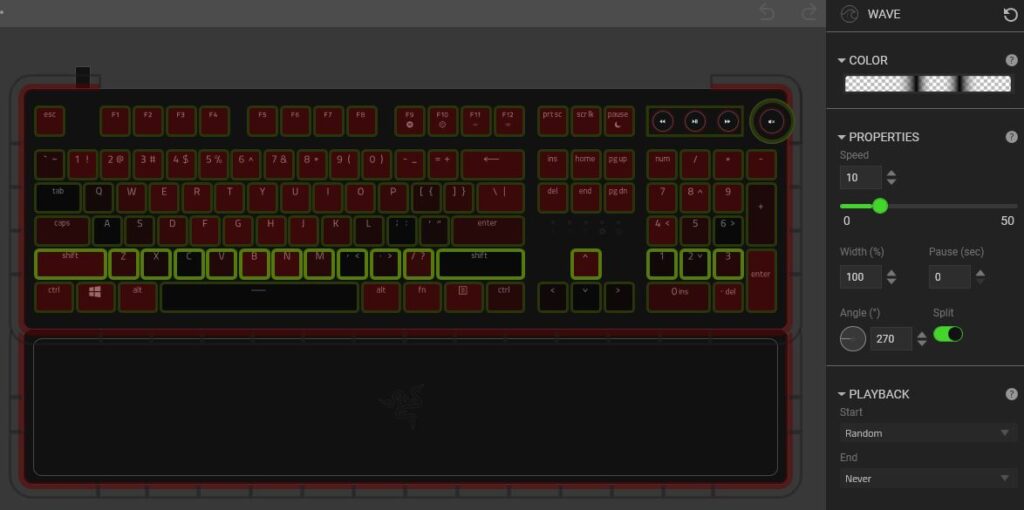
Next we’re going to be making the animated black wave effect that is visible on the keyboard. This can pretty tricky to make but if you follow these steps carefully it can be achieved.
Using the Wave effect layer we’re going to adjust our properties to the following:
- Speed: 10
- Angle: 270
- Split option: Enabled
Then select the entire bottom row of the keyboard. Here we’re going to simply put 2 black nodes in the center of the color gradient with a transparent node on each side.
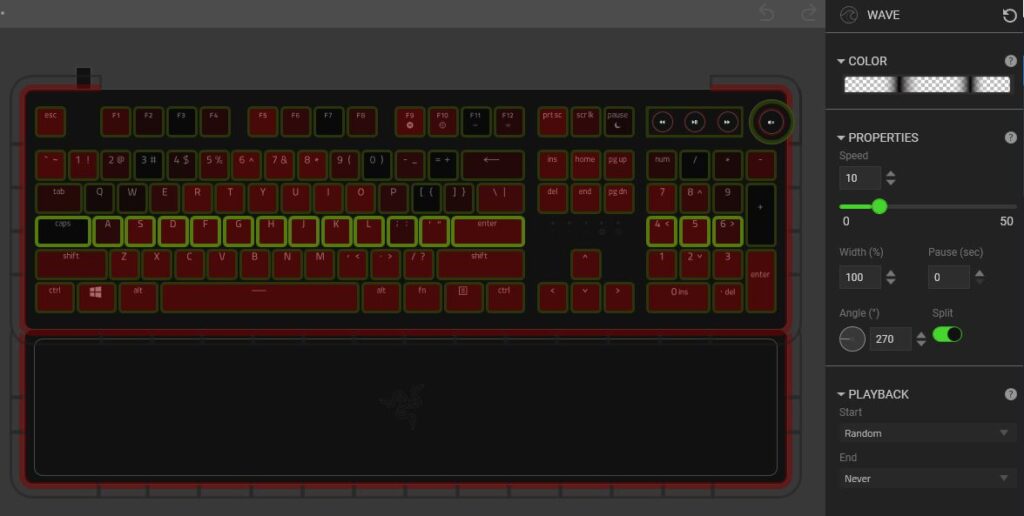
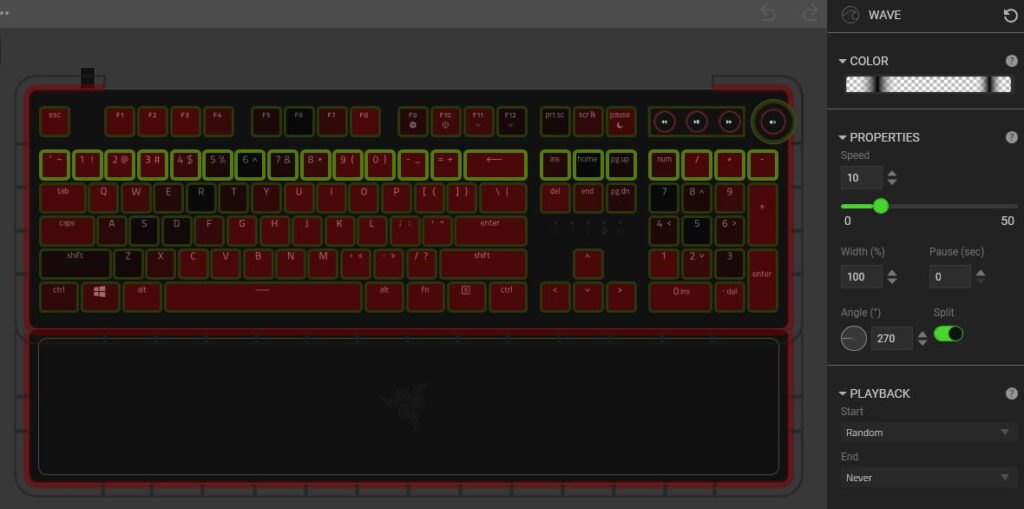
For each row of keys we adjust as we move up our keyboard we’re going to slowly separate the 2 black nodes further and further apart adding transparent nodes between them to separate them.
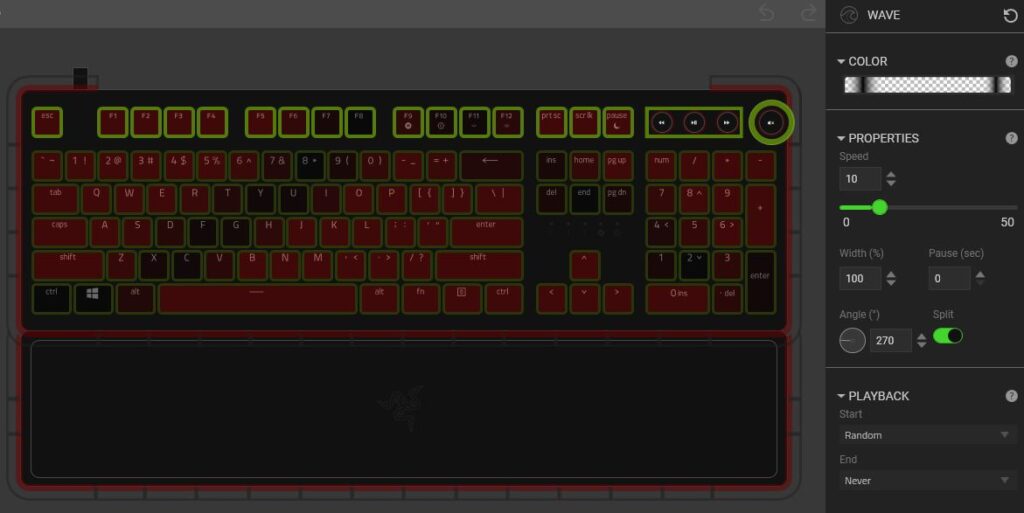
When you get to the top row of keys the black nodes should be at the 2 ends of your color gradient. For all row of keys in between, try to space them out as equally as possible.
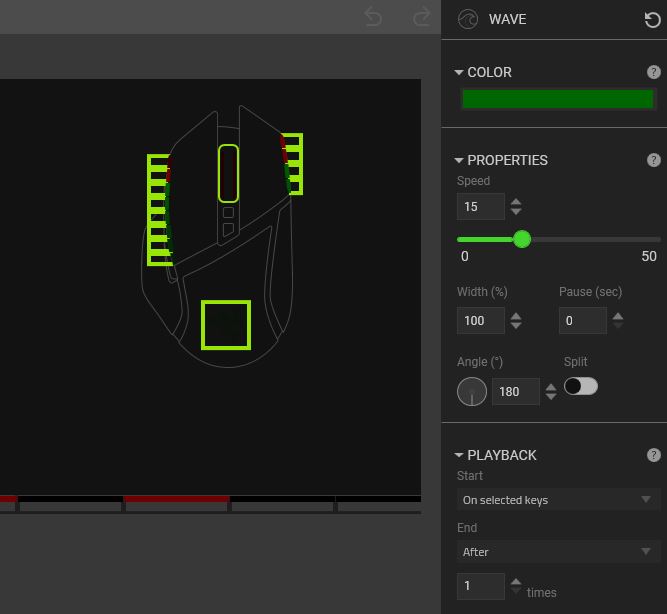
Wave 2
The next layer will be a unique Wave effect layer and is completely dedicated to your gaming mouse. This step can be skipped if you do not have one.
The properties we are adjusting are as follows:
- Angle: 180
- Playback > Start: On Selected Keys
The Color gradient is just a single green node
This wave layer is designed to be an entertaining reactive layer which responds on mouse clicks. I personally think it’s better than using the Ripple or actual Reactive effects.
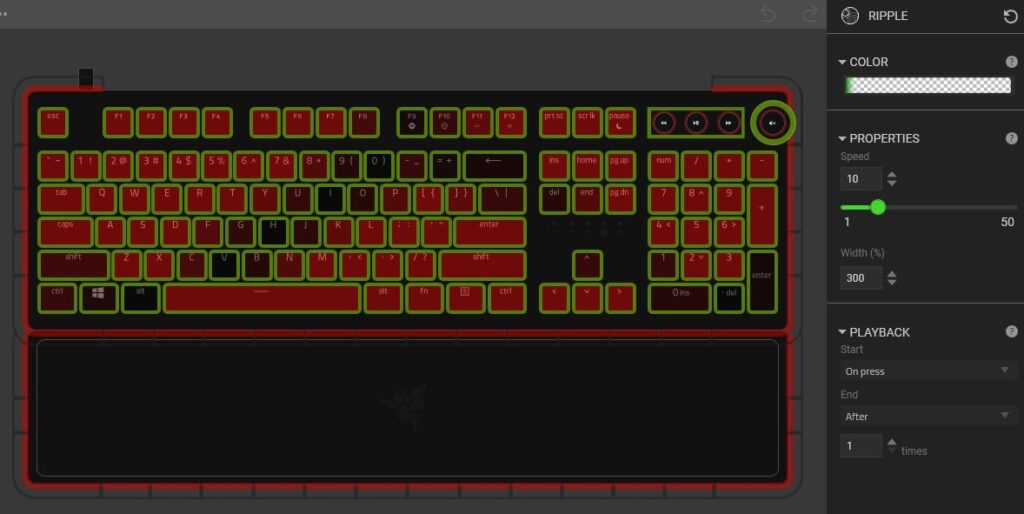
Ripple
Lastly, I chose to put a green Ripple effect layer on which only travels for a few keys before going away. This was design to symbolize poison spreading on the keyboard.
To accomplish this add a Ripple effect layer with just a 2 node color gradient. A green node will be almost all the way to the left side of the color gradient with only a small sliver of space between the edge and the node.
Right up against the green node to the right is a transparent node which is what allows the ripple effect to get cut off and not travel as far on the keyboard.
Conclusion
The marriage of the unique animate wave effect and the green ripple make this design truly superb. Those who are in favor of red and black color palates will truly enjoy this one.
If you liked this design, be sure to check out my Deadpool profile I recreated which is also red and black.
Razer Devices Used in this Profile
- Huntsman V2 Analog (Keyboard)
- Huntsman Elite (Keyboard)
- Huntsman Mini – Mercury White – (60% Keyboard)
- Basilisk Ultimate (Wireless Mouse)
- Firefly V2 (Mouse Pad)
- HDK LED Light Strip(Not Available)
- Nommo Chroma (Desktop Speakers)
- Chroma RGB Controller
- Tomahawk ATX Chassis
- Razer Light Strip Set
- V1 Tech Custom ARGB GPU Backplate
- Yeelight Chroma Connect
- MSI Mystic Light Chroma Connect
- Nanoleaf Chroma Connect
Follow UnrealHero

If you’re a fan of RGB then you might consider following for my latest content on these platforms


Can’t figure out how to import Razer Chroma Profiles??
Check out THIS POST to learn how!
DOWNLOAD HERE
Want more Cool Razer Chroma Profiles? Check out my Profile Gallery

Join our Chroma Profiles community on Reddit or Discord! There are thousands of members sharing ideas, tips, and even more Chroma Profiles.
безкоштовний акаунт на бнанс
Sunday 23rd of February 2025
I don't think the title of your article matches the content lol. Just kidding, mainly because I had some doubts after reading the article.
yearlymagazine
Thursday 30th of January 2025
I am not sure where youre getting your info but good topic I needs to spend some time learning much more or understanding more Thanks for magnificent info I was looking for this information for my mission
influencersginewuld
Friday 24th of January 2025
Its like you read my mind You appear to know so much about this like you wrote the book in it or something I think that you can do with a few pics to drive the message home a little bit but instead of that this is excellent blog A fantastic read Ill certainly be back
yearlymagazine
Friday 27th of December 2024
you are truly a just right webmaster The site loading speed is incredible It kind of feels that youre doing any distinctive trick In addition The contents are masterwork you have done a great activity in this matter
Binance Sign Up Bonus
Tuesday 10th of December 2024
Can you be more specific about the content of your article? After reading it, I still have some doubts. Hope you can help me.